Animated Film Environment Project
- James Lim

- Sep 15, 2020
- 6 min read
Updated: Oct 1, 2020
9/15/20
The second project of my VIST 372 class is a group project, in which we recreate an environment/set from an animated film. My group of four have chosen to do Flo's V8 Cafe from Pixar's Cars (2006).

For this scene, there is a lot of symmetry and repeating elements, but certain assets may prove to be quite difficult to reproduce. One part of this picture that our professor suggests we recreate is the character Flo. Despite not necessarily being a part of the environment, we will be treating her as such in this project.
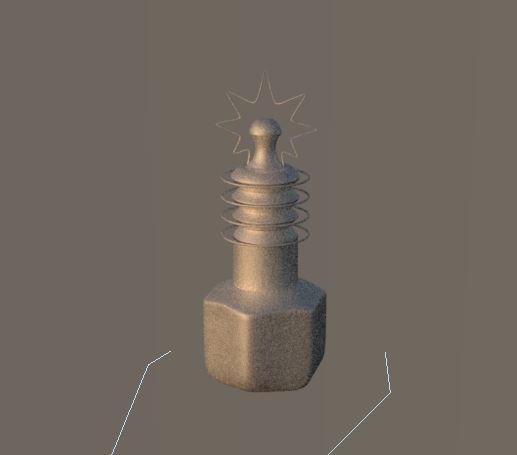
In the original scene, there are certain animated elements in the environment, such as the flashing of the lights above the gas stalls, as well as the spinning wingnut on the roof of the building, but these will not be very difficult to animate.
In the meantime, I have been set to tackle the modeling the spinning wingnut and, arguably the most difficult asset in this scene, Flo. It was agreed amongst my teammates that Flo would be the most time consuming to model, which is why I am only modeling her and one other simpler object. Once we figured out how to divide the modeling work, I began to craft my approach. Since Flo is a very curvy car, I figured I was going to use NURBS to most of the modeling. I learned a lot about NURBS in the last project, so I am a little more prepared to model Flo, despite how intimidating it seems. I started by finding a high resolution image of Flo to map out my plan. This image was a reference from Cars 2 (2011), but there was only one very minor detail that had been changed between the two films (at least from what I observed).
I made a rough outline of how I was going to accomplish the modeling, including a general wireframe I may use, plans for how to model certain details, and so on. On thing I am considering for a later time is animating Flo's eyes so that she feels more alive in the final render.

I couldn't find any orthographic concept art of Flo online, so I made my own rough orthographics in Photoshop. It will be helpful when I start modeling, so that the model appears to have proper proportion.
We are planning on placing Flo in the same location as the original reference, so we only see her front and left sides. The main modeling focus will be on the visible sides.
With that, I am ready to start modeling Flo as soon as possible.
9/23/20
It was a long and difficult process modeling Flo. I completely underestimated how long it would actually take to model the car, and overestimated how well my approach would be.
I started by importing my orthographic reference into Maya. I initially decided that my approach to modeling would be to primarily use NURBS.

I started by creating multiple NURBS curves that would run along the profile of the car, which would then be lofted together. For the most part, I divided it into multiple parts according to my original piece. The parts I had were the main body, the hood, the top part (I had no better name for this, but it is the part with the windshields and windows), and to a lesser extent, the "trunk" area.
There came a point where it was extremely difficult to manipulate the car as a NURBS object. Adjusting some control vertices messed with others in the surrounding area, so I took a break and went began modeling my other object, the wingnut.
Modeling this was very simple and only took less than an 30 minutes. I took a polygon cylinder, scaled the top, and extruded faces on the sides to make the wing shape. Then I beveled the edges so that the shape would retain when in smooth view.

For the parts that were supposed to be neon, I used the EP curve too to trace the profile of the wing, then I extruded a NURBS circle along the profile curve before duplicating it. I used a similar process for the neon that wrapped around the center piece.
After completing the wingnut, I went back to modeling Flo. After some deliberation, I came to terms with the fact that I could not spend any more time with the car as a NURBS model, so I converted it to polygons. It became much easier to manipulate as a polygon object, but at first the geometry was extremely messy. The tessellation from NURBS to polygons is not perfect so I spent a long time cleaning up the geometry to make it more manageable.

I deleted faces to make room for the tires and I extruded multiple parts to create the the windshield, windows, and the detail on the side of the body. The wheels were made with cylinders extruded multiple times, and the metal accent that runs along the length of the car was a duplicated part of the car was a duplicated segment of the car, and I altered the geometry until it matched the shape I wanted.
The headlights were extruded polygon spheres and the lips were two cubes I stretched and merged at the ends.
For the "eyelid" I used a polygon plane and matched it to the shape of the windshield. As an added bonus, I wanted to include a blend shape which would animated Flo's eyes opening and closing. I duplicated the eyelid and modified one for when her eyes were wide open and one when they were half closed, as a midpoint. I selected them in the proper order, half-closed, open, and original, and created a blendshape. out of it. I then made a set driven key out of this blendshape. Creating a custom attribute in the windshield, I keyed it so that users could control Flo's blinking easily.
With that I have finished the modeling phase and move onto the texturing phase.
9/30/20
For the texturing phase, I textured a couple more objects than I modeled. This phase took nowhere near how long it took for me to model Flo. Flo's surfacing certainly took the longest, and had the most setbacks. UV unwrapping was difficult because I had to make use of the UV space even though there were so many points. At one point, some of the UVs were overlapping with each other, so I had to go back and redo them so that the final render would not have noticeable issues.

Once everything was in order, surfacing came by smoothly. For Flo's eyes, I went into photoshop and created a .png drawing of her eye and stamped it onto her eyespace in Substance Painter.
With the help of Brooke, my teammate, I learned the basics of how to attach textures to an object. I did so in Maya and did a test render of Flo. Then I finished texturing all my other models and also did test renders in Maya.
After I finished texturing the models, they were placed with the other completed assets. Hunter, who was in charge of the master scene and lighting, rendered the final scene.
I can say with confidence that this final product has a great likeness to the original reference, but I also acknowledge that there is much room for growth. Despite what I learned, I had many shortcomings. My biggest challenge in this project was certainly Flo herself. The model certainly looks like her, but I admit that I am not satisfied with how she appears in the final scene. I am not surfacing expert, so trying to recreate how she looks in the original scene right down to her inflections was an extremely difficult task I was not able to accomplish. In addition, because of the amount of time left on the project, we were unable to animate the parts of the scene that are moving, such as the spinning wingnut or the flashing lights on top of the stalls.
One of the major lessons I learned from this was that sometimes, even if you make a plan, plans can fail. I initially had an approach to modeling the car, but it became obsolete because modeling was not as simple as it initially seemed. I also learned how much harder it is to recreate an environment than it is to make your own. On one hand, I wish I had performed other roles besides just modeling and surfacing, but on the other hand, I have little to no experience in rendering and lighting. I missed out on an opportunity to learn more about those things.
Despite the low points of this project, this project was a great experience because of the lessons I learned from it. In the future, I hope that I may be able to work more on the things I was not able to.


Comments