Video Game Environment Project
- James Lim

- Oct 19, 2020
- 4 min read
Updated: Oct 29, 2020
10/4/20
Project Intro
The third project for my VIST 372 project is to recreate an environment from a video game in a game engine. For this project, my new group has chosen to recreate the chemistry lab from Episode 2 of Life is Strange (2015).

This scene appears challenging at first glance, because skimming through the entire room, there is a vast number of assets, some being much more detailed than others. But because there are multiple repeating elements, and modeling was divided among 5 people, this project will be challenging, yet exciting to undertake.
We are considering having our final composition in Unreal Engine. Most of the members of my team were not in the game design track except for one. She also owns the game and was able to go into the environment and record a walk-around of the room.
The main assets I am modeling for this scene are mostly the different tables (the lab tables, aquarium table, and the long table on the side of the room connecting 4 lab tables) and some smaller assets such as the flasks, beakers, and other equipment.
10/19/20
Modeling
The modeling phase of the project is mostly complete, with a couple more left to be UV unwrapped. Since the last update, I completed modeling my assets as well as UV unwrapping them and scaling them to the whitebox my teammate made in Unity. There were a few minor setbacks that hindered my progress.
Most of my models were not extremely complicated to model. I started with the easiest ones, which were the flask, beaker, paper towel roll, sponge, and fire blanket. I used the EP curve tool to trace the profile of the flasks and beaker and then used NURBS revolve. For the paper towel roll I simply used a poly cube and cut a hole down the middle. For the sponge, I just beveled certain edge loops until it matched the proper shape. The fire blanket was a polygon cube manipulated and beveled to form a bag-like shape, with straps that were cubes that were extruded into thin strips.


For the table assets, I basically just put multiple cubes together in the shapes of the tables in the environment. The sink faucet of the lab table consisted of multiple cylinders extruded to shape. The cabinet doors were flat cubes and the handles were extruded cubes.


Perhaps the most complicated and time consuming model I made was the triple beam balance. I took regrettably much longer to make this model than any other because I was trying to make it needlessly as detailed as possible. This model was a series of cylinders and cubes extruded to match a reference image found online.

The problems arose when I began learning more about how objects in a video game worked. First, NURBS objects apparently don't work in Unreal, importing one results in an error. I had to convert my flask and beaker into polygon objects. Next, while I was modeling in Maya, I was focused on modeling with smooth preview in mind, thinking that objects exported in smooth preview would show up smooth in Unreal. I learned, however, that video game objects are actually not "smoothed." This made sense, and I began to think about all the video games I had played, and how I have noticed some minor assets were not as high poly as others, but this is because they are less important and less scrutinized. In addition, I also learned about our polycount limit, which was somewhere between one million to two million. All that being said, I had to go back and rework the geometry of my models, adding and deleting edges where necessary.


I had also been UV unwrapping my objects as I went, but most objects ended up having to be unwrapped again after I altered the geometry. most of them were very straightforward, except for the triple beam balance. I UV unwrapped my models and some of my teammates' models. We will know be surfacing them.
10/28/20
Surfacing
We had many objects to surface for the final scene, so I was primarily in charge of texturing models. I came into this course with some knowledge of surfacing, but this project was the most I had ever done in a short period of time. While the work was intensive at times, the repetition was very helpful in solidifying what I knew about Substance Painter.
One important rule I learned when it comes to texturing is that no object is "clean." Most of the objects in our chem lab appeared somewhat worn and aged. Object stick out when they are completely free of some sort of impurity, such as dirt, grime, or smudges. I've learned that practically every object needs a subtle amount of grime and wear in order to fit into the scene better.


For these table assets, I generally used the same materials for the wood, tabletops, and metallic components. Throughout my texturing phase, I found myself reusing and repurposing the same handful of smart materials because they came with so many parameters that allowed me to change how the material looks.
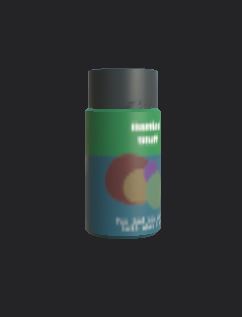
Because some assets are so small and less relevant, game designers give them a lower texture resolution. It becomes hard to tell what these objects are, but in the end, players will most likely not be paying attention to smaller irrelevant assets. That said, because I didn't know what they were, I had to make up my own products and make my own labels for some objects.


As I completed textures, my teammates plugged them into the scene. There were times where some textures needed to be tweaked because they looked a little out of place, usually because they looked too clean. With all the textures applied, this is what our final scene looks like.


I believe this project was more of an improvement upon the original scene, and I am personally proud of the way the final scene looks. If I could do something different about this project, I would have done less texturing to do more hands-on work in Unreal applying textures and set dressing. This project made me more appreciative of the struggle game designers go through when creating games. This insight has opened a door of possibilities for me in the video game industry.


Comments