Architectural Environment Project
- James Lim

- Nov 23, 2020
- 4 min read
Intro
The fourth and final project of my Digital Environments class was the Architectural or Historical Environment project. The goal of this project was to reconstruct an architectural or historical environment in CG. Students were given the option to deliver the final product in a game engine, or as a 5 second rendered animation.
For this project, my group chose to reconstruct the Wrocław Water Tower in Wrocław, Poland as a rendered animation in Maya
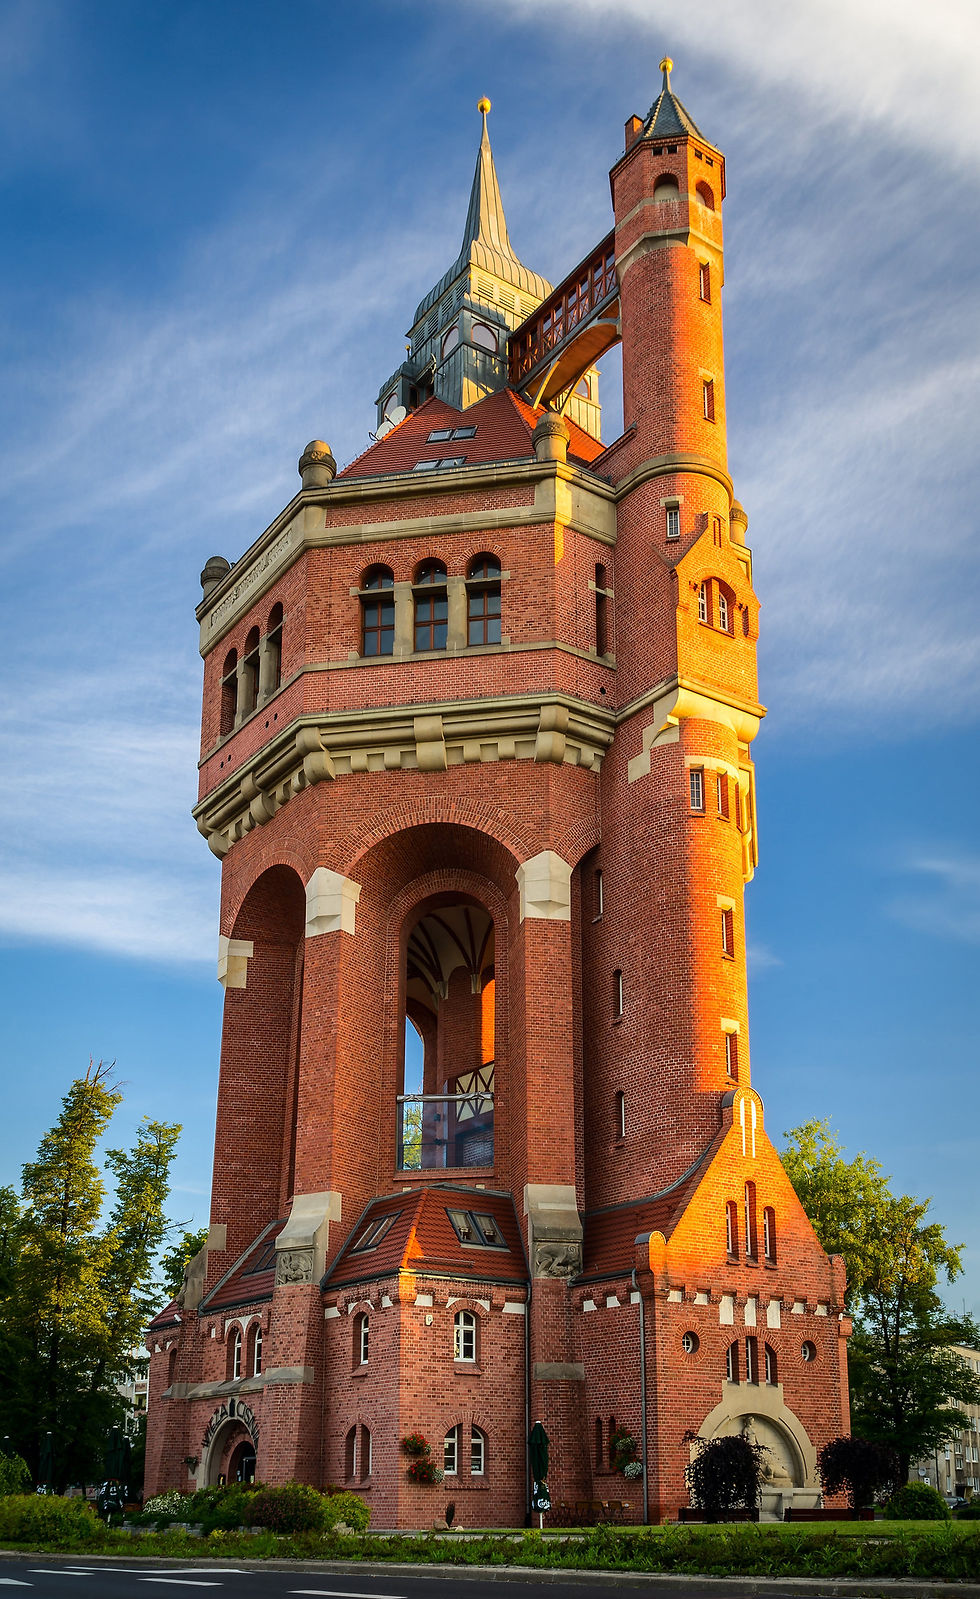
This building is a very interesting one because of all the different parts that are connected together to make one unified, aesthetically pleasing structure.
Modeling
In this project I was primarily responsible for the mid-section of the tower, which consisted of the pillars and arches. This part of the tower was very visually intriguing to me, which is part of the reason I wanted to do it.
The pillar/arch section is in the shape of an octagonal prism, so I started with an 8-sided cylinder primitive. I initially worked on one section of the octagon so that I could later on duplicate them around and combining them. I would extrude the pillars down, and then inwards twice to create the arches shown below.

My model was of low-poly count, with smooth mesh preview toggled on, and I later on realized how this would be an issue. One of my teammates noted that because of the way I modeled this section, surfacing would be more tedious and difficult. So I redid this model to be more convenient for surfacing, without the need for smooth mesh preview.
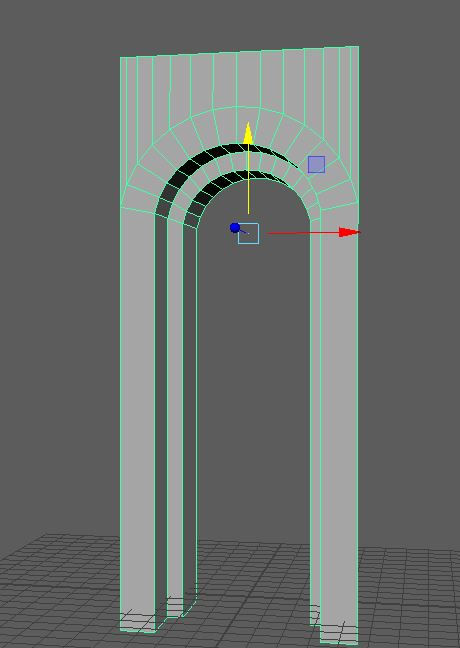

My new approach also started with a cylinder, but this time, I increased the subdivisions around the axis to about 30. I rotated this cylinder forward and deleted all the faces except for the ones on the cap. Then I deleted the bottom half of those faces, leaving me with semicircle. I extruded the edges of the semicircle to get the general shape of the arch. Then I extruded those faces inwards multiple times and deleted them.
This arch section was modified further until it matched the actual water tower.


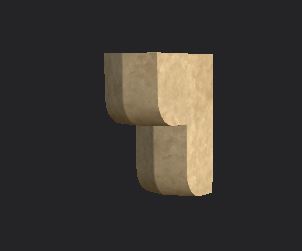
For the top white "cement" on each pillar, I took another 8 sided cylinder and deleted all but two adjacent sections. I then manipulated the geometry into the form. Again, this first version was approached with smooth mesh in mind, so I eventually went back and remodeled it to make it look better.
For the middle cement piece, I used a cube and extruded different parts and adding edge loops for curvature. With these middle cement pieces, there are carvings of certain creatures embedded in them. Modeling these would have been very tedious, so I planned on implementing a height map when I got to surfacing.

For the bottom cement piece, I approached it similarly to the top one. By taking an eight-sided cylinder, erasing all but two adjacent faces, and altering it to match.


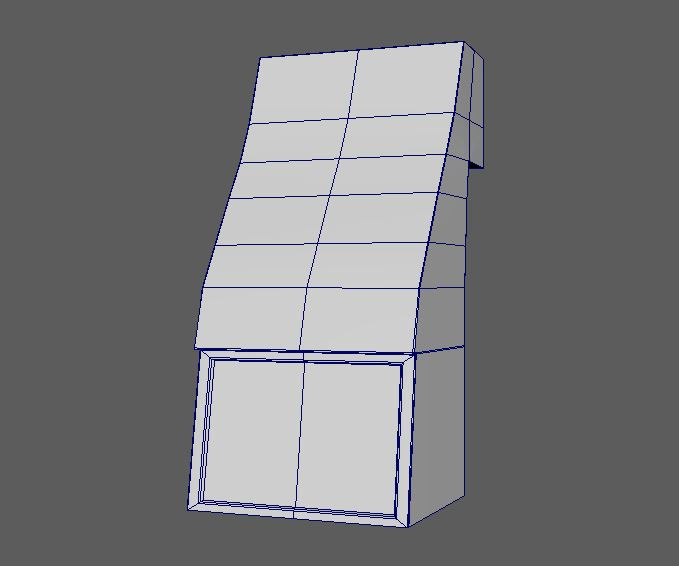
The last few parts that needed to modeled were the pieces of molding at the top of the pillar section for the long molding piece, I started with a long cube primitive. I added edge loops and selected a group of faces and extruded them out. I beveled the edges that needed to be curved make them smoother. Then I began extruding upwards to create the molding designs, bevel as I went.


The middle molding piece was worked in the same manner, separate from the long piece. Extruding a cube and beveling the curved edges. The side pieces were altered versions of the middle piece to match the angle of the octagon.

I completed each part of the model, I had been UV unwrapping as well. Once all these components were completed, they were all grouped together, duplicated, and rotated around to form the octagon. Then they were placed into the main layout scene with the other parts.

For the arch section in particular, the UV unwrapping was crucial because each arch a specific line of bricks around the curve, which I was looking to replicate in my model. I laid out the UVS in such a way that the bricks would all be much easier to layout and orient.
Surfacing
All the parts to the pillars were modeled, It was time to move on to textures. One of my teammates, Emmalie, had designed a brick texture to be used for the water tower. She attached the texture to the model for the arches in Substance Painter, and I took it a step further.


My process for the arches consisted of multiple layers. Each layer masked in a specific tile of each arch. Then for that tile, I would then rotate the brick texture to match to that chosen tile. I would then move to the next layer, mask out the next section, and repeat, until the full arch was textured.


The top cement piece and the molding pieces were the simplest models to surface. They were essentially a colored concrete texture with grunge and dirt applied to them.

For the bottom cement piece, it was very grungy and dirty, and at first, I tried to use a smart mask with edge wear built into it, but that didn't seem to work. So I manually painted the grunge on with a dirt brush.


I repeated the above process with the middle cement piece, but a little more work had to go into it because of the carvings. My strategy for this was to paint the design into the height map. It was difficult to make out what exactly the carvings were of, but looking through multiple different references, I got very close to what the actual carvings look like. I filled in the crevices and indentions with grime to better accentuate the carving.
Final Product
With my assets modeled and surfaced, they were attached by Emmalie and the whole tower was rendered out.
I can confidently say that this is a project my teammates and I are extremely proud of. Just like the actual Wrocław Water Tower, all the different unique parts of this piece come together neatly to deliver an awesome final product.


Comments